Using TeamCity for building Gradle Android applications
Disclamer: This post has been written for GSPD blog
Intro
We are developers. Developers like to architect apps, to write code and not to do any routine things. One of such things is to build signed apk file for testing guys to examine app quality before providing a new version higher to customers. In desperate times when deadline is coming we should do this again and again, after every little fix. That's why people invented Continuous Integration. We didn't think too much to determine CI tool we want to use. We all like JetBrains, Android developers have beautiful Android Studio, iOS developers have AppCode, we all use YouTrack as our task tracker so TeamCity is our choice because of its out of box YouTrack integration.
Installing TeamCity
First of all you need a server PC where TeamCity will be installed. We are using DigitalOcean virtual machine as temporary solution because of it's hipsterness price and ease to use. Ubuntu 14.04 / 64 bit is just what we need. Now connect to created virtual machine and start to configure it. Let install TeamCity to user home directory.
cd ~
TeamCity requires Java installed on the machine so:
sudo apt-get update
sudo apt-get install openjdk-7-jdk`
After installation we need to add JDK to PATH variables
nano /etc/environment
And add this line:
JAVA_HOME="/usr/lib/jvm/java-7-openjdk-amd64"
Ctrl+X / Enter to save and exit from nano.
Then we need to download TeamCity (get latest version url from JetBrains site) and unpack it
sudo wget http://download-cf.jetbrains.com/teamcity/TeamCity-9.0.4.tar.gz
sudo tar xfz TeamCity-9.0.4.tar.gz
Now go to unpacked TeamCity folder
cd TeamCity
bin/runAll.sh
More about TeamCity installation and configuring you can find on JetBrains confluence page
It's pretty easy to understand. You create admin account firstly and then you need to connect build agent. Build agents can be installed separately even on a remote machine and then can be connected to TeamCity. Here we don't need this, let's use default build agent on this system, runAll should have started it.
Android
If you want to build android things you need to install Android SDK. Most of us got used to download SDK archive with browser and then configure and get updates with GUI Android SDK Manager but here we should imagine that we're hackers and do it from console.
Downloading Android SDK (you can find latest SDK package here on d.android.com):
wget https://dl.google.com/android/android-sdk_r24.2-linux.tgz
Unpack it
sudo tar -xfz android-sdk_r24.2-linux.tgz
Go in
cd android-sdk-linux
Let's download all android versions and build tools
tools/android update sdk
After installation we need to add Android SDK directory to PATH parameters of system
nano ~/.bashrc
And add these two lines in the beginning of the file
export PATH=${PATH}:~/android-sdk-linux/tools
export PATH=${PATH}:~/android-sdk-linux/platform-tools
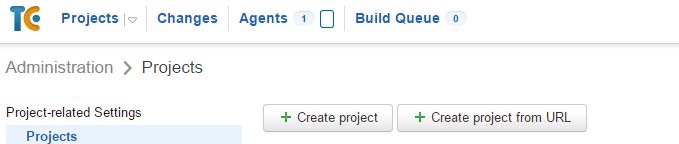
Configuring project in TeamCity
Go to Administration Then you can chose how to create project. Easiest way here is to create project from URL (we use Bitbucket git repository, so it's super easy to copy git url from Bitbucket and create project from it)
After creating you can go inside this project and click "Create build configuration" button
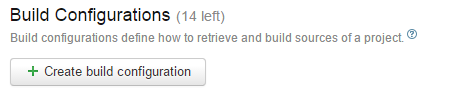
In General Settings you need to write path to folder where the apk will be created. By default it looks like this:
app/build/outputs/apk/app-release.apk
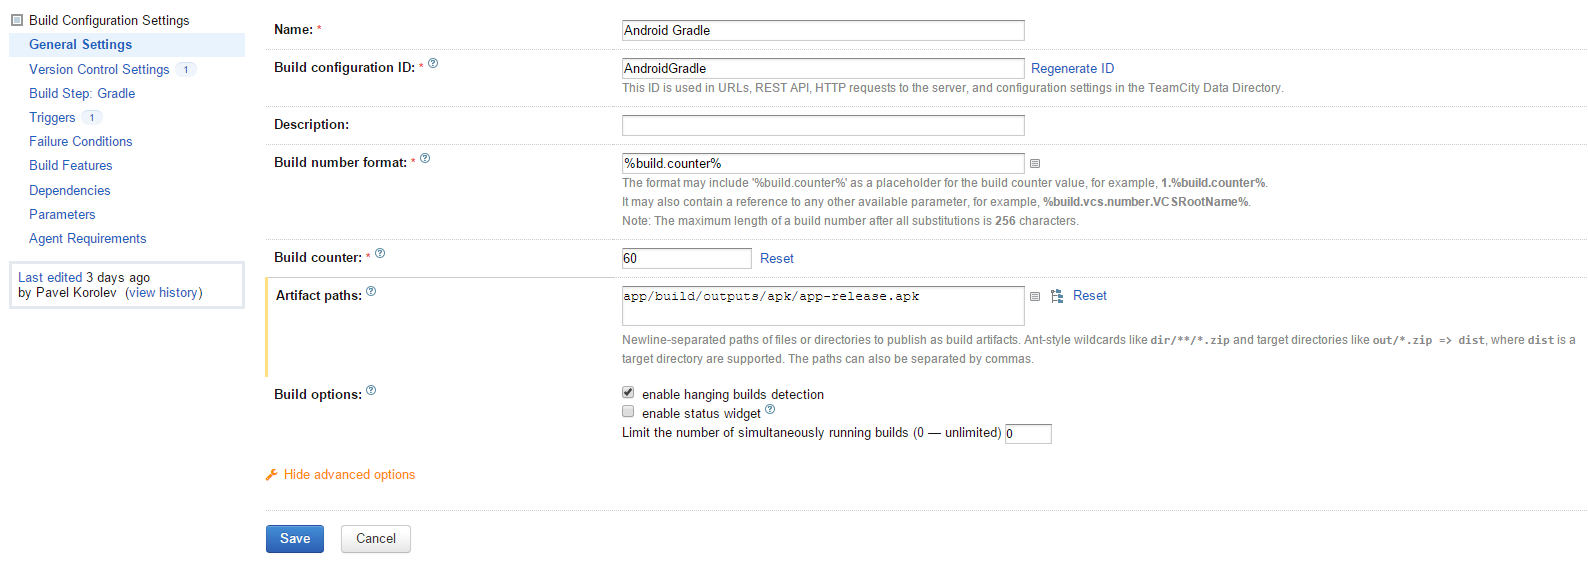
Then we go into the Build steps and click "Add build step" button (I already have one here on screenshot)

And build step configuration should be looking like the next screenshot
Now we can go to Triggers menu and Add new VCS Trigger to make build when new VCS check-in detected.

Updating android app
You should create signing keystore in the usual way and add it to your project folder Then add this code to build.gradle file so Gradle will know how to sign your APK file
android{
    ...
    signingConfigs {
        release {
            storeFile file("FILENAME.keystore.jks")
            storePassword "YOUR_KEYSTORE_PASSWORD"
            keyAlias "YOUR_KEY_ALIAS"
            keyPassword "YOUR_KEY_PASSWORD"
        }
    }
    ...
     buildTypes {
        release {
            ...
            signingConfig signingConfigs.release
        }
    }
}
I assume here keystore file is located in /app folder so I wrote only file name, but if you have keystore file in another place then you should write here an relative path to keystore file.
Enjoy
Well, now you can click "Run" button in projects list to checkout project from repository and build it. Your APK file can be downloaded now from TeamCity, you can see "Artifacts" link in projects list with arrow which opens drop-down menu of all apks in project. app-release.apk in our case. Due to VCS trigger your apk will be made on every changes pushed to repository.