
I had an idea to host a blog by myself for a long time and finally got it done. The main thing which stopped me until this moment was a lack of experience in DevOps stuff and perfectionism in terms of how to make things easier for me.
All I wanted to do is write posts, push it to some repository. Another side of this pipeline looked so complex to implement.
On the other hand, everything complex is fun. When you have fun complex things become easier, you get knowledge and fun both.
This is a success story about how I set up continuous deployment for the blog.
TODO
- Create a server on the remote VPS
- Configure HTTPS for a domain using Let's Encrypt
- Configure server once
- Make it easy to configure on any other machine
- Write posts locally with markdown
- Commit and push changes to the Github Repository
- Publish changes to the server automatically
Hugo
I won't explain anything Hugo specific here. Hugo is a static site generator that results in public directory with all site content. This content needs to be served. I will use Nginx for it.
Dockerfile to build docker image from public directory using Nginx.
FROM nginx:alpine
COPY ./public /usr/share/nginx/html
COPY ./nginx.conf /etc/nginx/conf.d/default.conf # You can omit this line if default nginx config is ok for you
EXPOSE 80
I have this simple nginx.conf in the root of my project alongside Dockerfile. The main thing why I have this config overridden is the gorgeous 404 page.
server {
    listen       80;
    listen  [::]:80;
    server_name  localhost;

    location / {
        root   /usr/share/nginx/html;
        index  index.html index.htm;
    }

    error_page 404 /404.html;
    location = /404.html {
        root   /usr/share/nginx/html;
    }

    error_page   500 502 503 504  /50x.html;
    location = /50x.html {
        root   /usr/share/nginx/html;
    }
}
Github actions
I use Github Actions as CI/CD tool to build and deploy the blog Docker image. It's a simple and straightforward solution built in Github.
Github Container Registry
We need Docker Registry to deploy our images into. I use Github Container Registry which was introduced recently. You can use Docker Hub for the same purpose.
To use GHCR we should use Container Registry Personal Access Token. To create this token go to your Github user Settings, go to Developer settings → Personal access tokens, and click Generate new token. After filling the password this page will be opened. Check these checkboxes and click Generate token. Save result token for later use.

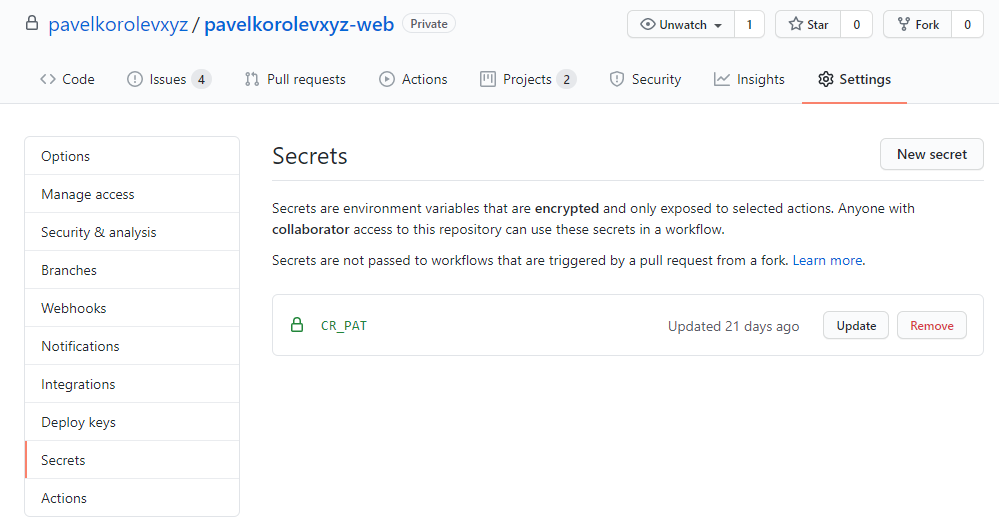
Secrets
When you have something secret to use in Actions you should add it as Secret to be encrypted by Github. This way you can create your Action without any private data hardcoded.
To add Secret string you can go to Settings tab, go to Secrets page and click New Secret button.
Let's add Secret named CR_PAT add paste token we have from the previous step.
So now we have everything to write Github Actions workflow.
To create Action you shoud create .github/workflows directory with action *.yaml file.
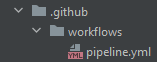
I created a workflow called pipeline.yml using everything from the previous steps.
name: Site Deploy # Action name. Can be anything you want.

on:
  push:
    branches: [ develop ] # Do this jobs on any push into develop branch

jobs:
  pipeline: # Job name. Can be anything you want.
    runs-on: ubuntu-latest
    steps:
      - name: Checkout
        uses: actions/checkout@v2 # Checkout project

      - name: hugo
        uses: klakegg/actions-hugo@1.0.0 # Run hugo action to create static `public` directory
        with:
          env: production # Set production env to separate local checks from production on

      - name: Set up QEMU
        uses: docker/setup-qemu-action@v1 # Set up QEMU to use BuildX
        with:
          platforms: all

      - name: Set up Docker Buildx
        id: buildx
        uses: docker/setup-buildx-action@v1 # Set up BuildX to use Docker Push action
        with:
          version: latest

      - name: Login to Registry
        uses: docker/login-action@v1 # Set up credentials for Docker registry
        with:
          registry: ghcr.io
          username: ${{ github.repository_owner }} # Use repository name as GHCR username
          password: ${{ secrets.CR_PAT }} # Container Registry Personal Access Token provided via secrets

      - uses: docker/build-push-action@v2
        with:
          context: . # Current directory context to create image from
          file: ./Dockerfile # Use Dockerfile from repository
          push: true
          tags: ghcr.io/${{ github.repository_owner }}/pavelkorolevxyz-web # Docker image tag to push
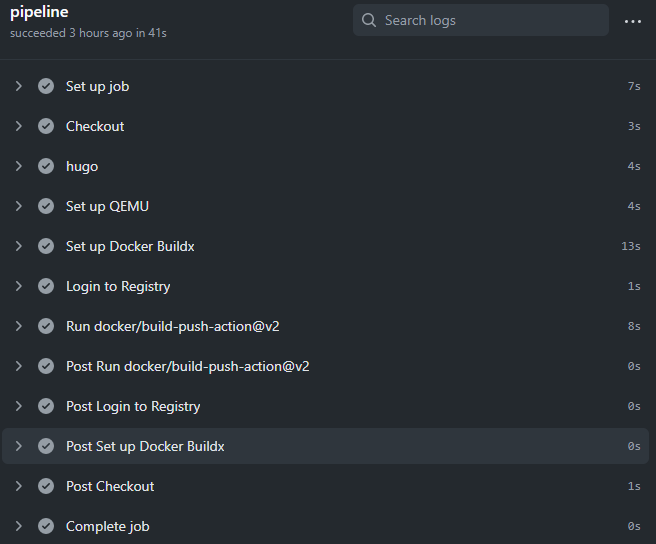
To see your actions you can go to Actions tab inside your repository.
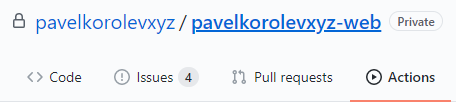
Now when you push to the develop branch you can see action log directly on Github.
Docker
We will use Docker Compose to run things on VPS. By using Docker Compose instead of plain Docker we can write configs in nice yamls and this way we can connect multiple containers.
Set up the repository and install Docker
At first, we need to install Docker on our VPS. All my examples are from Ubuntu 20.04 VPS.
Set up repository to load docker from.
sudo apt-get update
sudo apt-get install \
    apt-transport-https \
    ca-certificates \
    curl \
    gnupg-agent \
    software-properties-common \
    -y
curl -fsSL https://download.docker.com/linux/ubuntu/gpg | sudo apt-key add -
sudo add-apt-repository \
   "deb [arch=amd64] https://download.docker.com/linux/ubuntu \
   $(lsb_release -cs) \
   stable"
Install Docker.
sudo apt-get install docker-ce docker-ce-cli containerd.io
More information in the Official Guide.
Install Docker Compose
To use compose we need to install it as well.
sudo curl -L "https://github.com/docker/compose/releases/download/1.27.4/docker-compose-$(uname -s)-$(uname -m)" -o /usr/local/bin/docker-compose
sudo chmod +x /usr/local/bin/docker-compose
More information in the Official Guide.
Log in with Github Access Token
export CR_PAT= # Set your token here
echo $CR_PAT | docker login ghcr.io -u username --password-stdin
Where $CR_PAT is Github Access Token from Github Settings. GHCR username should be provided instead of username.
Watchtower
Okay. Now we have all changes pushed to repository uploaded to the registry without any help. So we need something to get these changed images on our server machine.
Watchtower is a crazy simple tool. It just pulls the latest images from remote periodically and can be started as a separate Docker container. If the latest image and started one are different then Watchtower restarts the container using a new image. Let's see how it is set up using Docker Compose.
watchtower:
    image: containrrr/watchtower # Watchtower image
    restart: unless-stopped # Set container to restart on exit or Docker restart
    volumes:
      - /var/run/docker.sock:/var/run/docker.sock # Listen for docker container changes
      - /root/.docker/config.json:/config.json # Set to use config to get credentials to pull from private repository
    command: --interval 60 # Run every minute
Traefik
I mentioned that I have pavelkorolev.xyz domain connected to my VPS. It's an understandable desire nowadays to make it work via HTTPS protocol as well as via HTTP.
Traefik is a powerful reverse proxy and load balancer tool, but all we need from Traefik here is its support for Let's Encrypt.
Let's sum up our intentions. We need to run Traefik as a Docker container on our server machine, configure it to redirect to Nginx inside the blog container, and resolve SSL certificates automatically.
Create a Docker proxy network. It will be used by our other containers to be in the same network as Traefik, so Traefik could proxy to them.
docker network create proxy
Create traefik directory anywhere on the server machine and data directory inside it. It's not required to make these directories structure like that, but my snippets below imply this structure and naming.
mkdir traefik
mkdir traefik/data
Create empty acme.json file inside data directory. It will be filled later by Traefik itself when it get certificates data.
touch traefik/data/acme.json
Create traefik.yml configuration inside data directory.
nano traefik/data/traefik.yml
Fill traefik.yml.
api:
  dashboard: true

entryPoints:
  http:
    address: ":80"
  https:
    address: ":443"

providers:
  docker:
    endpoint: "unix:///var/run/docker.sock"
    exposedByDefault: false

certificatesResolvers:
  http:
    acme:
      email: mail@example.com # your email address
      storage: acme.json # link for acme.json file to write into
      httpChallenge:
        entryPoint: http
Create Traefik dashboard credentials. Fill user and password, save result string for later use.
echo $(htpasswd -nb user password) | sed -e s/\\$/\\$\\$/g
Create docker-compose.yml for Traefik image in the traefik directory.
nano traefik/docker-compose.yml
Fill docker-compose.yml.
version: '3'

services:
  traefik:
    image: traefik:v2.0 # Traefik image to use
    container_name: traefik # Container name to run image
    restart: unless-stopped # Set traefik container to restart on exit or Docker restarts
    security_opt:
      - no-new-privileges:true
    networks:
      - proxy # Set traefik to use docker network we set up earlier
    ports:
      - 80:80 # HTTP port mapping
      - 443:443 # HTTPS port mapping
    volumes:
      - /etc/localtime:/etc/localtime:ro
      - /var/run/docker.sock:/var/run/docker.sock:ro
      - ./data/traefik.yml:/traefik.yml:ro # Traefik configuration file
      - ./data/acme.json:/acme.json # Traefik certificates file
    labels:
      - "traefik.enable=true"
      - "traefik.docker.network=proxy" # Set traefik to use docker network we set up earlier
      - "traefik.http.routers.traefik.entrypoints=http"
      - "traefik.http.routers.traefik.rule=Host(`traefik.example.com`)" # Set your domain here
      - "traefik.http.middlewares.traefik-auth.basicauth.users=username:password" # Set traefik dashboard credentials we got earlier
      - "traefik.http.middlewares.traefik-https-redirect.redirectscheme.scheme=https"
      - "traefik.http.routers.traefik.middlewares=traefik-https-redirect"
      - "traefik.http.routers.traefik-secure.entrypoints=https"
      - "traefik.http.routers.traefik-secure.rule=Host(`traefik.example.com`)" # Set your domain here
      - "traefik.http.routers.traefik-secure.middlewares=traefik-auth" # Set traefik dashboard to be secured with auth
      - "traefik.http.routers.traefik-secure.tls=true"
      - "traefik.http.routers.traefik-secure.tls.certresolver=http"
      - "traefik.http.routers.traefik-secure.service=api@internal"

networks:
  proxy: # Define external network to run traefik with
    external: true
Add permission to write into traefik/data/acme.json file. It's used to write Let's Encrypt certificates information.
chmod 600 acme.json
Run Docker Compose from the traefik directory.
cd traefik
docker-compose up -d
Blog config
Now we have everything configured. Our blog image is the one thing we didn't create config for.
Result docker-compose.yml for the project looks like this.
version: "3"

services:
  web: # My blog image configuration
    image: ghcr.io/pavelkorolevxyz/pavelkorolevxyz-web # docker image location in GHCR
    restart: unless-stopped
    labels:
      - "traefik.enable=true"
      - "traefik.http.routers.web.entrypoints=http"
      - "traefik.http.routers.web.rule=Host(`example.com`)" # Your domain
      - "traefik.http.middlewares.web-https-redirect.redirectscheme.scheme=https"
      - "traefik.http.routers.web.middlewares=web-https-redirect"
      - "traefik.http.routers.web-secure.entrypoints=https"
      - "traefik.http.routers.web-secure.rule=Host(`example.com`)" # Your domain
      - "traefik.http.routers.web-secure.tls=true"
      - "traefik.http.routers.web-secure.service=web"
      - "traefik.http.services.web.loadbalancer.server.port=80"
    networks:
      - proxy
  watchtower: # Watchtower configuration I described earlier
    image: containrrr/watchtower
    restart: unless-stopped
    volumes:
      - /var/run/docker.sock:/var/run/docker.sock
      - /root/.docker/config.json:/config.json
    command: --interval 60

networks:
  proxy: # Set external Docker network to use
    external: true
Now we can start it.
docker-compose up -d
Result
As result, I have:
Dockerfileto build a blog image from.- Traefik
docker-compose.ymlwith its configurationtraefik.ymlandacme.json. - Main
docker-compose.ymlto run a blog with Watchtower listening to its changes.
These files can be stored in the same repository for later use (just copy-paste from repo to remote VPS when configuring). The main bonus we got by using Docker is how easy we can bootstrap same configuration on any other machine.
TLDR setup blog from nothing
- Register domain
- Create VPS
- Bind VPS with domain
- Create repository with blog on Github
- If repository is private there is Secret setup needed in repo Settings.
- Create Github Action to publish blog Docker image into Github Container Registry
- ssh into VPS
- Install Docker and Compose
- Create a proxy network using Docker
- If repository is private there is GHCR auth needed
- Copy configs for Traefik to VPS (from above)
- Run Traefik compose
- Copy compose config for blog to VPS (from above)
- Run blog compose
That's all. All I need to do now to add a new post is to write it and push to the repository. All deployment stuff is automatic.
Isn't it clean enough? I think so.